Monday, March 25, 2013

Power To The Panel

Click on image to enlarge
 
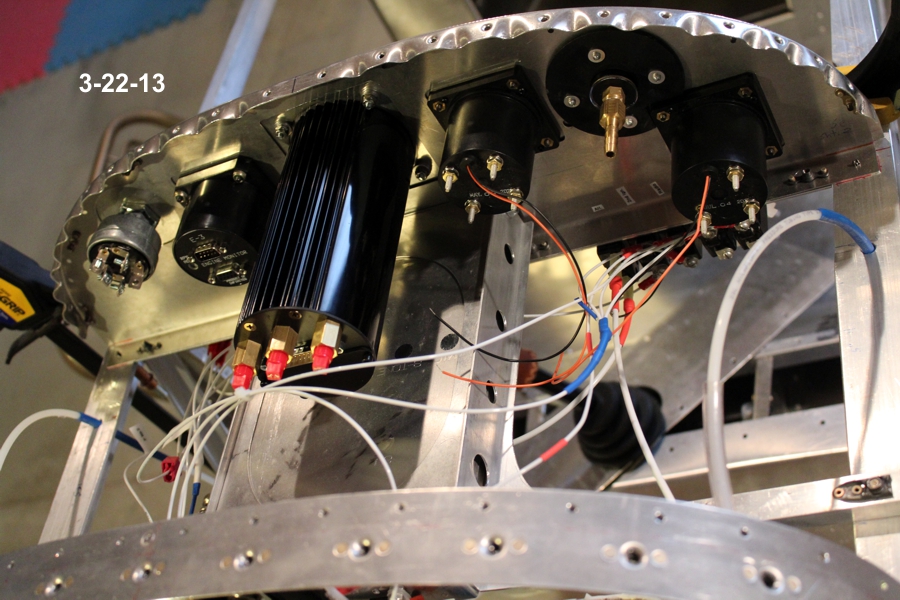
Continued wiring my panel.  I was able to bring online my Dynon D6 & my MGL E3. I still have a long way to go. The D6 comes with a remote compass that needs to be mounted somewhere behind the seat. I haven't even begun to wire my engine sensors.  Not having purchased an engine yet might have something to do with it.

Friday, March 22, 2013

Christmas in March


My Dynon D6 arrived today. This is what my panel looks like at this point.

Click on image to enlarge.
 
I had priviously painted my removable panel and installed the other instruments. This was the fun part.  Now I have to wire it all up!


I guess I know what I'll be doing this weekend.  It's suppose to snow anyway.  The NCAA ball games will be on in the background.  Throw in a couple of beers, and it should be a good one!

Wednesday, March 20, 2013

Making the Mandatory Rudder Cable Changes

Sometimes being a slow builder has it's advantages!!!  Dave Thatcher announced the original CX4 broke a rudder cable, thankfully while taxiing on the ground after 180 hours on the Hobbs.  Thus, he issued a mandatory change to the rudder cable system.  His solution is designed for the now standard floor mounted rudder pedals.  I still have the hanging type pedals.  No problem,  I just adapted what he wanted done to my setup. Fortunately, I still have sufficiant access to the fuselage to do the rework.  I feel for you guys who have painted, flying airplanes who have to take a panel or two off.

First, I bought some 3/16" SS cable with a 6-32 threaded stud swagged to one end (so I could use the original rudder pedal attachments) and nothing on the other, thinking I could leave the wire bound sleeve in place from the original push-pull cable device by cutting the rear end off, pull out the original cable and simply push in a new, longer cable. Well, I pushed the new cable in maybe a third of the way before I could no longer push any more cable through.  So, I decided to get out the calipers and measure the original cable. I discovered that the original cable was 5/64" not 3/16".  This meant the old carcass had to come out.

As a replacement to the wire bound sleeve/carcass for the cable to pass through, I found that the nylon tubing I had for break lines work perfectly for my 3/16" cable and I had some extra hanging in the garage.

Click on image to enlarge

Next I had to find a way to hold the nylon tubing in place so that the cable could move freely back & forth within it.  What I came up with is shown in the picture above.  It is a double sided compression fitting intended to splice two lines together.  In the middle of this fitting was a ridge intended to stop the tubes from passing through it.  I simply took the appropriate drill bit and drilled out the center ridge so that the nylon tube could pass completely through the fitting. Then I slipped the tube through and used only one side as a compression fitting. The other side was used to hold it in place through my F4 bulkhead.  Since original holes through F4 were too large, I made washers out of scrap alum. so the fitting would stay where I wanted it at F4.  You can see my results in the photos below. 


The tube comes out the same hole at the rear of the fuselage as the original cable. Since the tubing is secure and can not move due to the compression fitting at the F4 bulkhead, it is unclear at this point if I need to secure it near the rear exit.  I'll keep you posted.