If you remember, I created a fuel tank that would not fit under the tank cover skin and have the filler cap exposed as the plans call out for. Instead I had to lower the tank and now have to create a door to expose the fuel filler cap. Here are a few photos of what I'm working on.
Click on image to enlarge
I settled on a 5"x5" opening in the shape of a "D". I looked into using a DZUS or Camloc fasteners but they both require a relatively expensive specialized tool for inserting the grommets. I bought a Hartwell H-5000-2 latch from eBay but once it arrived, I discovered I didn't have the necessary clearance between the tank cover skin and the tank for it to be used. So I searched the internet and found a rotating, spring loaded latch that I thought would work for this application. I found it at Granger and it came in three sizes. The medium sized one is the one I purchased (part # 4RPY8) for about $10.00. Here are a couple of photos showing it in the open & closed positions.
This is what it looks like from the top.
As you can see, it has a very low profile as well.
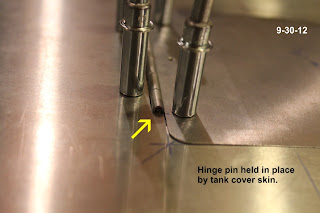
I made the supporting shelf from two layers of .032 aluminum. I had to use two layers in order to account for the thickness of the door hinge which was .032 as well. Once I got the two pieces shaped the way I wanted them to be, I used spray adhesive to hold the two pieces together until they could be riveted into position around the door opening. You should be able to see the two layers in the 1st photo above. Here are a some photos of the door temporarily in place.
Next up is to drill and rivet the shelf and hinge to the tank cover skin then to finish the installation of the skin itself. The door will need a slight arch in it to match the curve of the skin. Wish me luck on figuring this out.


